In the realm of new home construction, the installation of sheetrock stands as a cornerstone of the building process, crucial for both structural integrity and aesthetic appeal. From material selection to quality inspection, every step in the sheetrock installation journey demands meticulous attention to detail and adherence to best practices. This comprehensive guide delves into ten essential considerations for sheetrock installation in new home construction. Covering aspects ranging from material selection and measurement to safety precautions and integration with other systems, Specialized Drywall OJ INC aims to equip builders with the knowledge and expertise necessary to achieve professional-quality results. Whether you’re a seasoned contractor or a DIY enthusiast embarking on your first construction project, mastering these key considerations will pave the way for a seamless and successful sheetrock installation, laying the foundation for a beautiful and functional home.
Material Selection:
Sheetrock, also known as drywall or plasterboard, is a fundamental material in modern construction due to its affordability, ease of installation, and versatility. When embarking on new home construction, choosing the right type and thickness of sheetrock is essential to ensure durability, safety, and compliance with building codes.
Standard drywall panels typically come in 1/2-inch and 5/8-inch thicknesses and are suitable for most interior walls and ceilings. However, for areas prone to moisture, such as bathrooms, kitchens, and basements, moisture-resistant green board or cement board may be more appropriate to prevent mold and mildew growth.
Fire-resistant sheetrock options, such as Type X, are essential for certain areas of the home, including garages, utility rooms, and walls adjacent to furnaces or chimneys. These specialized panels contain additives that provide increased fire resistance, offering valuable protection in case of a fire emergency.
Additionally, soundproofing sheetrock is available for homeowners seeking enhanced acoustical performance in bedrooms, home theaters, or other noise-sensitive areas. These panels feature layers of gypsum and sound-dampening materials to reduce sound transmission between rooms, ensuring a quieter and more comfortable living environment.
Before selecting sheetrock materials, it’s crucial to consult local building codes and regulations to ensure compliance with relevant standards and requirements. By choosing the appropriate sheetrock materials for each area of the home, builders can optimize performance, longevity, and occupant comfort.
Measurement and Planning:
Accurate measurement and careful planning when installing sheetrock in new home construction to minimize waste, ensure proper fit, and streamline the installation process. Before purchasing materials, builders should meticulously measure the dimensions of walls, ceilings, and other surfaces to determine the quantity and sizes of sheetrock panels needed.
When planning the layout, considerations should include the placement of doors, windows, electrical outlets, light switches, and other fixtures that may affect the installation of sheetrock. Proper spacing and alignment are essential to avoid awkward cuts and ensure seamless transitions between panels.
In addition to accounting for architectural features, builders should also consider framing spacing and layout to optimize the installation process. Framing members should be spaced at standard intervals to provide adequate support for sheetrock panels and minimize the risk of sagging or warping over time.
Utilizing digital planning tools and software can facilitate the measurement and planning process, allowing builders to visualize the layout and make adjustments as needed before commencing installation. By investing time in meticulous measurement and planning upfront, builders can streamline the sheetrock installation process and achieve professional results with minimal hassle.
Preparation of Surfaces:
Proper preparation of surfaces is essential for ensuring a successful sheetrock installation in new home construction. Before installing sheetrock panels, builders should thoroughly inspect the framing to ensure it is straight, plumb, and free of defects that could affect the quality of the installation.
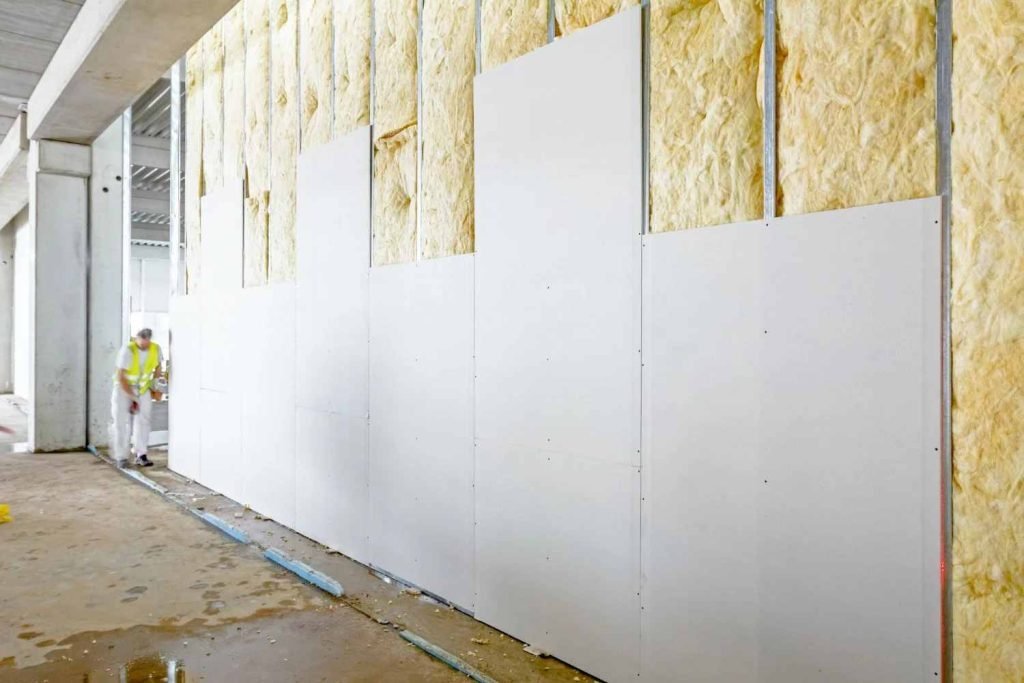
Any protrusions, uneven surfaces, or other irregularities should be addressed before proceeding with sheetrock installation to prevent issues such as bulging or cracking in the finished walls or ceilings. Additionally, builders should install insulation and vapor barriers as needed to improve energy efficiency and moisture control within the home.

Insulation should be installed according to local building codes and energy efficiency standards, with careful attention to proper sealing and placement to maximize thermal performance. Vapor barriers are essential in areas prone to moisture buildup, such as bathrooms and kitchens, to prevent condensation and mold growth behind the sheetrock.
By taking the time to properly prepare surfaces before installing sheetrock, builders can ensure a solid foundation for the installation and minimize the risk of future issues related to structural integrity, energy efficiency, and indoor air quality.
Safety Precautions:
Safety should always be a top priority when installing sheetrock in new home construction to protect workers from injuries and hazards associated with the installation process. Before beginning work, builders should conduct a thorough assessment of the job site to identify potential risks and implement appropriate safety measures.
Personal protective equipment (PPE) such as gloves, safety glasses, and dust masks should be worn by all workers to protect against injuries and exposure to dust and debris. In addition to PPE, proper handling and storage of sheetrock materials are essential to prevent accidents and ensure a safe work environment.
When cutting or installing sheetrock panels, workers should use appropriate tools and techniques to minimize the risk of accidents and injuries. Sharp utility knives should be used to cut panels to size, with care taken to avoid slips or mishaps that could result in lacerations or puncture wounds.
Furthermore, workers should exercise caution when lifting and maneuvering sheetrock panels to prevent strains, sprains, or other musculoskeletal injuries. Proper lifting techniques and teamwork can help distribute the weight of heavy panels and reduce the risk of accidents on the job site.
By prioritizing safety and implementing appropriate precautions throughout the sheetrock installation process, builders can create a secure and healthy work environment for all workers involved in new home construction projects.
Installation Techniques:
Achieving professional results when installing sheetrock in new home construction requires proper techniques and attention to detail. From cutting and fitting panels to securing them in place, builders must employ best practices to ensure a seamless and durable installation.
When cutting sheetrock panels to size, builders should use a sharp utility knife and straightedge to make clean, precise cuts. Score the front surface of the panel, then snap along the scored line to break the panel cleanly, avoiding jagged edges that can affect the fit and finish of the installation.
Fitting sheetrock panels around obstacles such as electrical outlets, light switches, and plumbing fixtures requires careful measurement and cutting to achieve a precise fit. Use a keyhole saw or rotary tool to cut openings in the panels, ensuring a snug fit around protruding fixtures without gaps or overlaps.
To secure sheetrock panels in place, use drywall screws or nails spaced at regular intervals along framing members. Fasteners should be driven flush with the surface of the sheetrock without breaking the paper facing, providing sufficient holding power without causing damage to the panel.
When installing multiple panels, stagger the joints between panels to create a stronger and more stable installation. Butt joints should be supported by framing members or backing strips to minimize the risk of cracking or sagging over time.
Finally, use joint compound and joint tape to conceal seams and fastener heads, creating a smooth and seamless surface for finishing. Apply multiple coats of joint compound, sanding between coats to achieve a level surface free of imperfections.
By mastering these installation techniques and paying attention to detail throughout the process, builders can ensure a professional-quality sheetrock installation service that enhances the overall appearance and functionality of the new home construction project.
Joint Treatment and Finishing:
Once sheetrock panels are installed, proper joint treatment and finishing are crucial to achieve a seamless and professional-looking surface. Joint compound, also known as mud, is used to fill gaps between panels, cover fastener heads, and create smooth transitions along seams and edges.
To begin, apply a layer of joint compound along the joints between sheetrock panels, embedding joint tape into the compound to reinforce the seams. Use a drywall knife to smooth out any excess compound, ensuring that the tape is fully covered and adhered to the surface.
After the initial layer has dried, apply additional coats of joint compound, feathering the edges outward to blend with the surrounding surface. Sand the dried compound between coats to remove any bumps or imperfections, gradually achieving a smooth and level finish.
Pay special attention to corners and edges, where seams meet at right angles, to ensure sharp, clean lines. Use corner bead or metal trim to reinforce and protect outside corners, applying joint compound to conceal the edges and create a seamless transition.
Throughout the finishing process, maintain proper ventilation and allow sufficient drying time between coats to ensure a durable and long-lasting finish. Once the final coat of joint compound has dried, sand the surface one last time to achieve a smooth, uniform texture ready for priming and painting.
By following proper joint treatment and finishing techniques, builders can achieve professional-quality results and create a polished, aesthetically pleasing surface in new home construction projects.
Drying and Curing:
After joint treatment and finishing, allowing adequate time for drying and curing is essential to ensure a durable and long-lasting sheetrock installation. Joint compound typically requires 24 to 48 hours to dry fully, depending on factors such as humidity, temperature, and the thickness of the applied coats.
During the drying process, proper ventilation is crucial to facilitate evaporation of moisture from the joint compound and prevent the buildup of humidity, which can prolong drying times and compromise the integrity of the finish. Open windows and doors, and use fans or dehumidifiers as needed to promote airflow and accelerate drying.
Once the joint compound has dried completely, it undergoes a curing process during which it hardens and becomes fully bonded to the sheetrock surface. While drying primarily involves evaporation of water, curing involves chemical reactions within the joint compound that strengthen its molecular structure.
To ensure thorough drying and curing, avoid applying excessive moisture or humidity to freshly finished surfaces, as this can impede the process and lead to issues such as cracking or delamination. Allow sufficient time for the joint compound to cure fully before proceeding with priming and painting.
By allowing proper drying and curing time for joint compound, builders can ensure a stable and durable sheetrock installation that withstands the test of time and maintains its integrity for years to come.
Priming and Painting:
Priming and painting are the final steps in finishing a sheetrock installation, enhancing its appearance and protecting it from moisture, stains, and wear over time. Before priming, ensure that the sheetrock surface is clean, dry, and free of dust, debris, and any residual joint compound.
Apply a coat of primer to the sheetrock surface using a high-quality paint roller or brush, ensuring even coverage and thorough penetration into the porous surface. Primer serves as a base coat that seals the sheetrock and promotes adhesion of the paint, ensuring a smooth and long-lasting finish.
Once the primer has dried completely, typically within a few hours, apply one or more coats of paint to achieve the desired color and finish. Use a high-quality acrylic latex paint for interior applications, choosing a finish such as flat, eggshell, satin, or semi-gloss based on aesthetic preferences and functional requirements.
When painting sheetrock walls and ceilings, work methodically from top to bottom, using long, smooth strokes to minimize brush or roller marks and achieve a uniform finish. Allow each coat of paint to dry completely before applying subsequent coats, and avoid applying thick layers that can lead to drips or streaks.
After the final coat of paint has dried, inspect the sheetrock surface for any imperfections or touch-ups needed, addressing any areas of concern before completing the finishing process. With proper priming and painting techniques, builders can enhance the appearance and durability of sheetrock installations, creating a visually appealing and long-lasting finish in new home construction projects.
Integration with Other Systems:
In new home construction, integrating sheetrock installations with other building systems such as electrical, plumbing, and HVAC is essential to ensure proper functionality and aesthetic appeal. Coordination between trades is crucial to ensure that sheetrock panels are installed in a manner that accommodates the placement of fixtures, outlets, switches, and vents.
Before installing sheetrock, communicate with other trades to identify the locations of electrical wiring, plumbing pipes, ductwork, and other components that may impact the installation process. Provide clear guidance to ensure that these systems are installed within the framing cavities or routed through designated openings to avoid interference with sheetrock panels.
For areas requiring access to mechanical or plumbing systems, such as utility closets or service areas, install access panels or removable sections of sheetrock to allow for maintenance and repairs as needed. Coordinate the placement of these access points with other trades to ensure convenient and unobtrusive access while maintaining the integrity of the sheetrock installation.
During the installation process, take care to avoid damaging or obstructing other building systems, such as electrical wiring or plumbing pipes, to prevent costly repairs or delays. Use caution when cutting sheetrock panels to avoid accidentally severing wires or puncturing pipes hidden within the wall or ceiling cavities.
By coordinating sheetrock installations with other building systems and trades, builders can ensure seamless integration and optimal functionality throughout the new home construction project, enhancing the overall quality and value of the finished product.
Quality Inspection:
Upon completion of sheetrock installation and finishing, conducting a thorough quality inspection is essential to identify any defects, imperfections, or areas requiring touch-up or repair before proceeding with further construction or interior finishes. A comprehensive inspection ensures that the sheetrock installation meets established standards and specifications, providing a solid foundation for subsequent phases of the project.
During the inspection process, carefully examine all sheetrock surfaces for signs of damage, such as cracks, dents, or bulges, that may indicate issues with installation or structural integrity. Pay particular attention to seams, corners, and edges, where imperfections are most likely to occur, and assess the overall smoothness and consistency of the finish.
Once identified issues have been addressed and any necessary touch-up or repair work has been completed, conduct a final inspection to verify that all quality standards have been met and that the sheetrock installation is ready for the next phase of construction. By prioritizing quality inspection and proactive problem-solving, builders can minimize rework and ensure a successful sheetrock installation in new home construction projects.
Conclusion:
In conclusion, the process of sheetrock installation in new home construction encompasses a myriad of considerations, each vital in ensuring a successful outcome. By carefully selecting materials, meticulously measuring and planning, and adhering to safety protocols, builders can lay the groundwork for a solid and aesthetically pleasing sheetrock installation. Attention to detail during joint treatment, drying, and finishing stages further enhances the quality and durability of the final product. Integration with other building systems and thorough quality inspections add layers of complexity but are essential for seamless functionality and long-term satisfaction. Ultimately, mastering these considerations empowers builders to create homes that not only meet structural standards but also exceed expectations in terms of beauty, functionality, and durability. With dedication to best practices and a commitment to excellence, the sheetrock installation process becomes not just a construction task, but a cornerstone of craftsmanship in new home construction.