Attaching Sheetrock to wall studs might look simple, but doing it the right way ensures durability, a smoother finish, and fewer repairs in the long run. Whether you’re working with wood studs or metal studs for drywall, understanding proper sheetrock installation methods can make the entire project more efficient. Many homeowners jump straight into hanging drywall without checking wall stud spacing, choosing the proper fasteners, or using correct Sheetrock hanging techniques. However, taking time to learn the appropriate process will help you create a clean, stable surface that supports taping, finishing, painting, and insulation.
You’ll also notice that modern drywall projects rely heavily on accurate framing, secure fastener placement, and clean seams. Missing any of these steps typically leads to cracks, loose panels, or sagging walls. Additionally, browsing professional resources like Sheetrock Services or exploring guides like How to Repair Sheetrock Walls can provide deeper insights into the repair and installation process. Now, let’s walk through everything you need to know to attach Sheetrock to wall studs like a pro.
Understanding Wall Studs and Why They Matter
When it comes to Sheetrock wall studs, the framing beneath your wall determines strength, alignment, and long-term durability. Wood studs for Sheetrock are the most common, offering easy fastening and good grip. However, metal studs for drywall are increasingly popular because they resist warping, mold, and cracking.
Before you start attaching panels, inspect your studs. Please make sure they are plumb, evenly spaced, and free of bowing. Many installation problems begin with uneven or misaligned studs. Moreover, check that your wall stud spacing for drywall is correct—typically 16 inches on center for most residential builds and occasionally 24 inches on center in some layouts. If spacing is inconsistent, measurements and panel alignment will be off later.
Preparing your studs properly ensures the Sheetrock sits flat against the frame. This helps reduce joint stress and shifting over time. Furthermore, proper spacing provides adequate support for your drywall edges and prevents sagging or cracking during seasonal changes.
Choosing the Right Sheetrock for Your Wall
Before attaching anything, choose the right panel. Standard panels work well for most dry rooms, but moisture-prone locations benefit from moisture-resistant or mold-resistant options. The type of Sheetrock you select affects weight, ease of installation, and performance.
Thicker boards (½-inch and ⅝-inch) are typically used for walls and ceilings, offering better sound reduction and structural integrity. Lightweight panels make installation easier, especially for ceilings. Consider fire-rated boards for garages and furnace rooms since they help slow the spread of flames. For high-traffic areas requiring durability, look for tougher, impact-resistant Sheetrock varieties.
If you’re uncertain, visiting a professional service like Specialized Drywall OJ Inc. can help you determine the best material for your specific project. Their guidance ensures you pick the right board before you even start installation.
Measuring Wall Stud Spacing for Drywall
Accurate measurement is one of the most critical steps in any Sheetrock installation project. Even if your studs appear properly spaced, verify their spacing with a tape measure.
Start by locating each stud with a stud finder. Mark their positions across the entire wall using a pencil or chalk. These marks will guide you when driving screws through the Sheetrock into the studs themselves. If the studs aren’t correctly aligned, fix or adjust the framing before continuing.
Furthermore, your drywall edges must fall directly on studs. This ensures proper support and prevents cracking at the edges during finishing. When edges are left unsupported, they often flex and break when joint compound is applied later.
Precise wall stud spacing for drywall also makes future tasks, such as taping and texturing, easier. Straight lines allow your seams to sit flush, reducing the amount of mudding needed in the final steps.
Cutting and Preparing Sheetrock Panels
Once your measurements are complete, it’s time to cut your Sheetrock to the correct size. Using a sharp utility knife, score the panel along a straight line using a T-square. Snap it cleanly along the score, then cut the back paper layer. This method gives you a clean, crisp edge.
Work slowly and carefully to avoid damaging the gypsum core. Rough edges or tearing can create problems during finishing, requiring extra mud and sanding. When cutting around outlets, switches, or fixtures, measure twice to ensure accurate placement.
Before lifting each panel into place, dry-fit it against the studs. This confirms that your measurements are correct and reduces the risk of misaligned seams. For additional guidance on accurate cutting techniques, refer to their resource titled “Cutting Gypsum Board Accurately.”
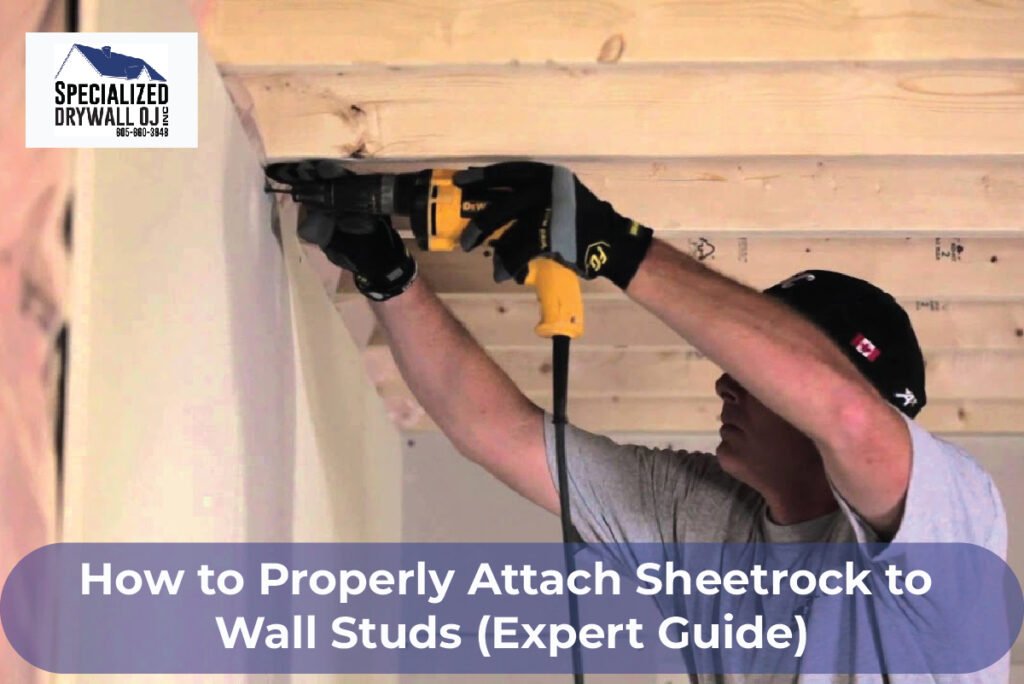
Best Sheetrock Fasteners to Use
Choosing the proper fasteners is essential for secure Sheetrock installation. Drywall screws are the most common, especially when attaching Sheetrock to wood studs. These screws provide strong holding power and reduce the risk of popping.
For metal studs, use fine-thread drywall screws explicitly designed for thin metal framing. Coarse threads won’t hold securely in metal, and nails should generally be avoided altogether.
When placing Sheetrock fasteners:
- Drive screws ⅜ inch away from the edges to prevent cracking
- Make sure the screws sit slightly below the surface without tearing the paper.
- Keep screw spacing at about 16 inches apart horizontally.
- Avoid overdriving, which weakens the connection.
This ensures the Sheetrock sits flush against the wall stud and remains secure for years.
Hanging Sheetrock Panels Correctly
Now it’s time to attach your Sheetrock panels using proper Sheetrock hanging techniques. Start at the top of the wall and work downward. This reduces the risk of gaps forming at the seams and helps align the panels more smoothly.
Lift the panel into place, then drive screws into the panel along your stud marks. Work from the center outward so the Sheetrock attaches evenly and doesn’t bow. If you encounter any gaps, adjust the panel before adding more screws.
Horizontal installation is usually recommended because it reduces the number of seams and strengthens the overall wall structure. However, for tall ceilings, vertical installation can be easier to handle.
Using a partner during this step speeds up and improves the accuracy of installation. If you’re working alone, use a drywall lift to keep the panel safely in place.
Finishing Sheetrock After Installation
Once each panel is attached to your Sheetrock wall studs, the next step is finishing. Apply joint compound over seams, covering edges and screw heads. Use drywall tape to strengthen these seams. Paper tape is ideal for flat joints, while mesh tape works well for repairs and corners.
Apply multiple coats of compound, sanding lightly between layers. Smooth finishing reduces visible lines after painting and improves the overall appearance of your interior walls.
Taking your time while finishing ensures you get a professional look without extra repairs later. Once the surface is smooth and ready, you can prime and paint your drywall to complete the project.
Final Thoughts
Attaching Sheetrock to wall studs correctly can make a massive difference in the longevity and strength of your walls. From measuring stud spacing to securing each fastener, every step matters. Investing time in preparation and using high-quality materials ensures fewer repairs and smoother finishes in the future. For professional assistance or additional drywall services, you can always explore Specialized Drywall OJ Inc. for expert craftsmanship and support.
FAQs
1. What tools do I need to attach Sheetrock to wall studs?
You’ll need a tape measure, utility knife, drywall screws, a drill, a T-square, a level, and a stud finder for accurate installation.
2. Is it better to screw or nail Sheetrock?
Screws are better because they hold tighter and reduce the risk of popping over time.
3. Should Sheetrock be hung horizontally or vertically?
Horizontal installation is usually preferred because it reduces seams, but vertical installation works for tall ceilings.
4. Can I attach Sheetrock to metal studs?
Yes, but you must use fine-thread screws designed explicitly for metal framing to ensure secure attachment.
5. What is the ideal wall stud spacing for drywall?
Most homes use 16 inches on center, though some framing layouts use 24 inches on center, depending on the structure.