Walls are more than just boundaries for your rooms—they’re part of the character and beauty of your home. But over time, even the best-maintained walls show wear and tear. From minor dents and holes to visible cracks and seam issues, wallboard repair is something every homeowner faces eventually.
The good news? Most problems are fixable with patience, the right materials, and some know-how. Whether you’re dealing with minor wallboard patching or full-scale wallboard damage repair, this guide will walk you through solutions that blend your repairs so seamlessly that no one will ever know there was an issue in the first place. And if you prefer to leave it to the experts, Specialized Drywall OJ Inc. offers professional wallboard repair techniques that save you time and deliver a flawless finish.
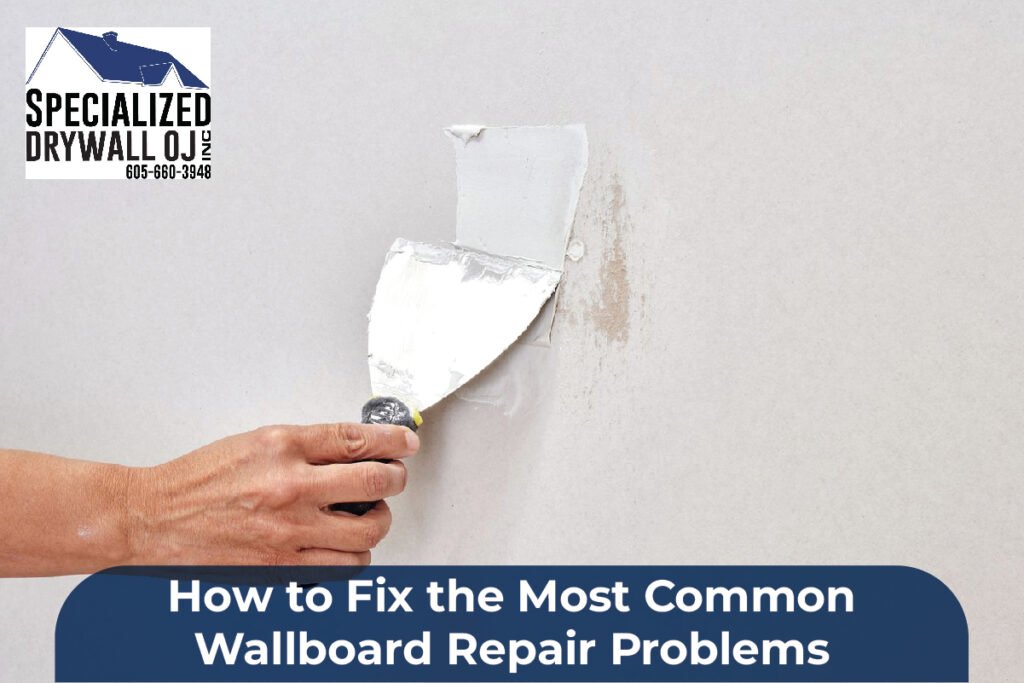
Small Holes and Dents—Quick Patch Fixes
One of the most common problems in wallboard repair is the small hole or dent—often caused by furniture, door handles, or even an accidental bump.
For minor drywall patch repair, you can use lightweight spackle. Simply clean the area, apply the filler with a putty knife, and smooth it out. Once it dries, lightly sand the surface and paint to match your wall color.
Consider using a patch kit for slightly larger dents or wallboard hole repair. These come with self-adhesive mesh and compound for a simple, clean fix. If you’re new to DIY, this is an easy way to learn the basics of patching wallboard holes without a steep learning curve.
Cracks Along the Joints—Stop Them from Coming Back
Cracks along the seams are a telltale sign of stress on your wall. Wallboard crack repair often involves re-taping and applying fresh joint compound.
First, remove any loose tape or flaking compound. Apply a thin coat of mud, embed new drywall tape, and smooth it out. Once dry, follow with two more thin coats of compound, sanding lightly between each one.
Pro tip: Don’t just cover the crack—address the cause. Cracks near doors or windows may indicate settling or moisture issues. In that case, fixing the underlying cause will help prevent repeated wallboard joint repair later.
Nail Pops—A Small Problem That’s Hard to Ignore
Nail pops happen when nails or screws push out from beneath the surface of your wallboard. While they’re usually cosmetic, they can be frustrating to see.
First, use a screwdriver to sink the fastener slightly below the surface to repair a nail hole. Next, add a drywall screw nearby for additional reinforcement. After that, cover the area with joint compound, and once it dries, sand it down and repaint it. This straightforward method for fixing wallboard damage helps ensure the issue won’t recur in the same spot.
Large Holes—Professional-Level Repairs
When dealing with holes larger than a few inches, you’re looking at a more advanced wallboard patching job.
Start by cutting a clean square or rectangle around the damaged area. Use the removed section as a template to cut your replacement piece. Secure it with screws to the wall studs or a support board behind the opening. Tape the seams, then apply several thin layers of joint compound, sanding between coats.
Larger holes require patience—if you rush, you’ll have visible seams or uneven surfaces. Hiring a professional for drywall patch repair can save hours of frustration. You can read more on modern wallboard methods in this resource.
Water Damage—Acting Fast Is Key
Water-damaged wallboards often bubble, stain, or become soft. Wallboard damage repair in these cases usually means cutting out and replacing the affected sections.
First, address the source of moisture. Then, remove the damaged area, ensuring you cut back to dry, solid material. Install new wallboard, tape, and finish as you would with standard can development; you can quickly do this on wet walls, so never skip this inspection step.
Seam and Joint Issues—Smooth Them Out
Visible seams are one of the most frustrating wall flaws. They happen when wallboard joint repair wasn’t done correctly the first time or when walls settle.
To fix, slightly sand down the raised area, then apply a wide coat of joint compound feathered far beyond the seam. This makes the transition gradual and hides any lines once painted. Remember: a wider spread with thinner layers blends better than a narrow, thick patch.
Matching the Texture—The Final Touch
Even if your wallboard repair techniques are flawless, a mismatched texture can give away your work instantly.
For a smooth finish, simply sand, prime, and paint. For textured walls, you’ll need to replicate the pattern using a spray texture, sponge, or trowel—whichever matches your existing style. Always test on a small scrap piece before applying it to the repair.
When to Call a Professional
Some wallboard repair projects are perfect for DIYers. But a professional can sidestep your mistakes, such as extensive wallboard hole repair, multiple cracks, or moisture damage.
Specialized Drywall OJ Inc. specializes in everything from patching wallboard holes to large-scale damage repair, ensuring results that last and look great.
Final Thoughts
Repairing wallboard problems doesn’t have to be overwhelming. You can restore your walls to their original beauty. Following proper wallboard repair techniques, from tiny dents to large holes, each issue has a fix that blends perfectly with your home’s style.
And don’t hesitate to bring in the experts when the job feels too big—or you want that perfect, professional finish. With the right approach, your walls will look brand new, and no one will ever know there was a problem.
FAQs
Q1: How long does wallboard repair take?
Minor repairs can be completed in under an hour, but larger holes or water damage repairs may take several days due to drying times.
Q2: Can I patch wallboard holes without replacing the board?
Yes, small holes can be patched with spackles or a patch kit. Larger holes often require replacing the damaged section.
Q3: What’s the difference between drywall and wallboard?
They’re essentially the same material—wallboard is another name for drywall or gypsum board.
Q4: How do I prevent cracks from coming back after repair?
Address underlying issues like settling or moisture before making repairs to ensure they last.
Q5: Is matching wall texture complex?
It can be tricky, but with the right tools and a little practice, you can achieve a seamless look.