If you’ve ever tackled a renovation or DIY wall project, you know that cutting gypsum board—also called drywall or plasterboard—is a job that demands precision. A sloppy cut can mean uneven seams, wasted materials, and extra finishing work. But the good news? Once you learn the proper gypsum board cutting techniques, you can achieve clean, accurate cuts every time.
Whether building a new wall, repairing a damaged one, or installing ceilings, mastering how to cut gypsum board is essential. This guide will walk you through the process, blending professional drywall cutting methods with practical, hands-on advice. We’ll also share tips for making straight cuts, cutting holes, and working safely so your project looks polished from start to finish.
Know Your Tools Before You Cut
The first step in accurate gypsum board cutting techniques is choosing the right tools. The basics include:
- Utility Knife for Gypsum Board—Ideal for scoring and snapping straight cuts.
- Drywall Saw—Perfect for minor cuts, curves, or irregular shapes.
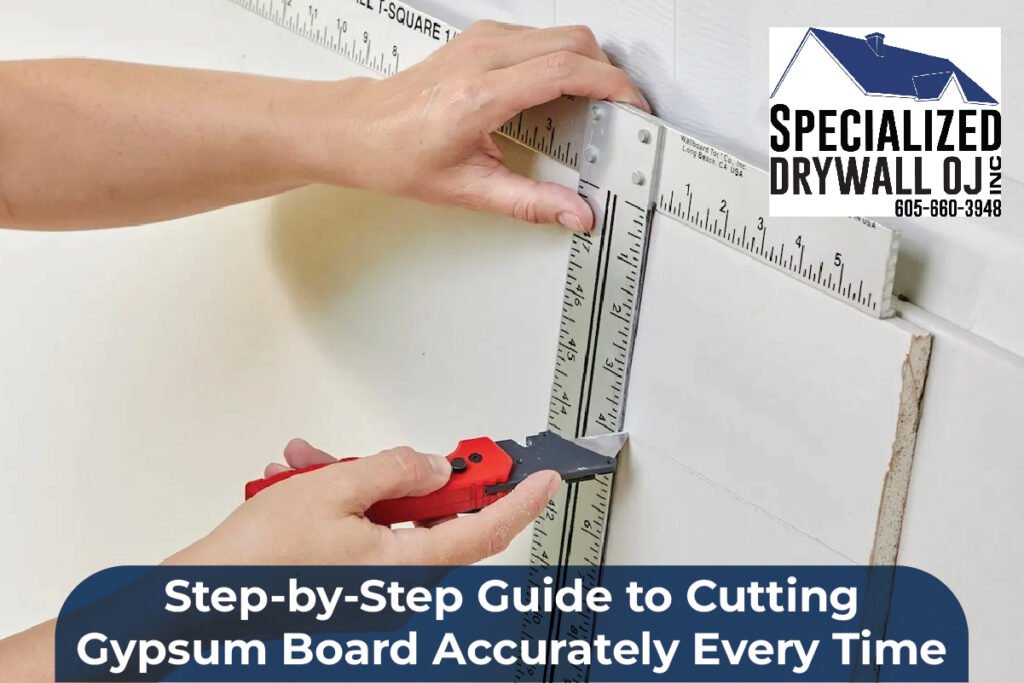
- T-Square or Straightedge—Helps ensure your lines are perfectly straight.
- Measuring Tape—Precision starts with accurate measurements.
When cutting large sheets, having a sturdy work surface is essential. If you’re unsure about tool selection, Specialized Drywall OJ Inc. offers professional insights and services that can help guide your choices.
Measure Twice, Cut Once
One of the golden rules of any construction project applies here too—measure twice, cut once. Before marking your board, ensure your measurements are exact to avoid costly mistakes.
Place your tape measure along the length or width you need, then use a pencil to mark the measurement points. Connect these points with a T-square for a perfectly straight cutting line. Inaccurate markings will result in uneven seams, throwing off your entire wall alignment.
Scoring and Snapping for Straight Cuts
For most straight-cut drywall applications, the gypsum board scoring and snapping method is the fastest and cleanest option. Here’s how:
- Place your board flat on a stable surface.
- Align your straightedge along the cutting line.
- Use your utility knife to score the paper face deeply enough to weaken the gypsum core.
- Lift the board slightly and snap it cleanly along the score line.
- Cut through the remaining paper backing to separate the pieces.
This method works best for standard cuts and keeps your edges sharp with minimal dust.
Cutting Holes and Openings
Sometimes, you’ll need to cut holes for outlets, switches, or pipes—this is where gypsum board hole-cutting techniques come in.
A hole saw attachment on a drill is efficient for small circular holes. For rectangular or irregular shapes, trace the outline and use a drywall saw technique to follow your lines precisely. Keep the saw angled slightly to prevent chipping the board edges.
Remember to check behind the wall before cutting to avoid damaging electrical wires or plumbing lines.
Using a Drywall Saw for Detailed Cuts
When straight cuts aren’t enough—like when working around window frames or curved designs—a drywall saw technique is your go-to. Its pointed tip allows you to punch through the gypsum surface easily.
Saw slowly to avoid fraying the paper and creating rough edges. If you’re cutting multiple boards with complex shapes, it’s worth practicing on scrap material first. This will sharpen your skills and save you from ruining full boards.
Safety First: Protect Yourself and Your Space
Safe gypsum board cutting is just as important as accuracy. Always wear safety glasses to protect your eyes from dust and debris. A dust mask or respirator will prevent inhalation of fine gypsum particles, especially if you’re doing a lot of sawing.
Keep your workspace clear to avoid tripping hazards, and ensure your board is fully supported before cutting to prevent breakage. Having a partner makes the job safer and easier for large or high-area installations.
Pro Tips for Flawless Results
Here are some cutting plasterboard tips that pros swear by:
- Score deeper on thick boards – Multiple light passes are better than one aggressive cut.
- Use sharp blades –A dull utility knife will tear paper instead of slicing cleanly.
- Be mindful of humidity– Moisture can weaken gypsum and cause crumbling at the edges.
- Support both sides during snapping– Prevents accidental breaking beyond your cut line.
Hiring Specialized Drywall OJ Inc. can save you time and ensure a professional finish if you’re new to drywall work. If you’re new to drywall work
Avoiding Common Mistakes
Many DIYers rush through drywall cutting methods and end up with avoidable errors. Common mistakes include measuring only once, cutting without a straightedge, or forcing a snap before the score is deep enough.
Take your time—accuracy in this step means less sanding, filling, and fixing later. Cutting too small is another frequent issue; it’s better to cut slightly larger and trim down if needed.
Final Thoughts
Cutting gypsum boards accurately isn’t just about getting the right size—it’s about creating smooth, clean edges that make the rest of your project easier. You can achieve professional results at home with the proper gypsum board cutting techniques, a steady hand, and a little patience.
To explore why gypsum board is an excellent wall choice, check out this article from Specialized Drywall OJ Inc.
FAQs
1. What’s the easiest way to cut a gypsum board?
For most straight cuts, scoring with a utility knife and snapping is the fastest and cleanest method.
2. Can I use power tools to cut the gypsum board?
Yes, but hand tools like a utility knife or drywall saw are often safer and create less dust.
3. How do I cut a hole for an outlet?
Mark the outline, then use a drywall saw or hole saw to cut along the lines.
4. Do I need special blades for gypsum boards?
A sharp standard utility blade works fine, but replace it often to maintain clean cuts.
5. Is it okay to cut gypsum boards outdoors?
Yes, cutting outdoors reduces indoor dust, but ensure the board stays dry to avoid damage.