Sometimes life happens—a doorknob hits too hard, kids roughhouse indoors, or you move heavy furniture a little too quickly. Before you know it, there’s a gaping hole in your drywall. If you’ve ever faced this problem, you probably know that repairing small dents or nail pops is easy. But when it comes to a big, ugly hole? That’s where it gets tricky. Don’t worry—fixing a large drywall hole isn’t rocket science. With the right tools, techniques, and a little patience, you can restore your wall to look brand new.
This guide will walk you through every step of drywall hole repair, from prepping the damaged area to finishing with a smooth paint job. Whether you’re a DIY enthusiast or just trying to save money before calling a drywall repair service, you’ll find these tips incredibly useful.
Why Fixing Drywall Holes Matters
Large holes in drywall are more than just an eyesore—they can cause long-term issues if ignored. For example, holes expose your wall cavities, making it easier for pests or drafts to sneak inside. Plus, leaving damage unattended decreases the value of your home and makes repainting or redecorating harder down the road.
When you fix drywall holes properly, you not only improve the look of your walls but also maintain the structural integrity of your interior spaces. A professional drywall patch repair ensures a seamless surface, but the good news is—you can achieve almost the same result at home with some practice.
Tools and Materials You’ll Need
Before you dive into drywall patching, gather your supplies. Using the right materials makes the process smoother and guarantees better results.
Here’s a quick checklist:
- Drywall repair kit (optional but handy)
- Utility knife or drywall saw
- Measuring tape and pencil
- Replacement drywall piece
- Wood strips or furring strips (for backing support)
- Drywall screws and drill
- Joint compound (mud)
- Drywall tape (paper or mesh)
- Sanding block or sponge
- Paint and primer to finish
Pro tip: If you’re working on a small drywall hole repair, a simple patch kit may do the job. For larger holes, however, you’ll need replacement drywall and support strips.
Step 1: Prep the Damaged Area
Start by cleaning the area around the hole. Remove any loose drywall, debris, or chipped paint. Then, use a utility knife to cut the edges of the hole into a neat square or rectangle. This step might feel unnecessary, but trust me—it makes the patch fit snugly and creates cleaner lines.
If wires or pipes are visible behind the hole, be extra cautious. You don’t want to damage electrical or plumbing systems while prepping.
Step 2: Install Backing Support
For large drywall hole repair, backing support is essential. Without it, your patch will sag or eventually crack. Place a wooden strip (or furring strip) inside the hole, spanning across the opening. Secure it with drywall screws, leaving enough surface behind the hole for the patch to rest on.
Think of this backing as the anchor holding your patch in place. Once installed correctly, it creates a solid foundation for the new piece of drywall.
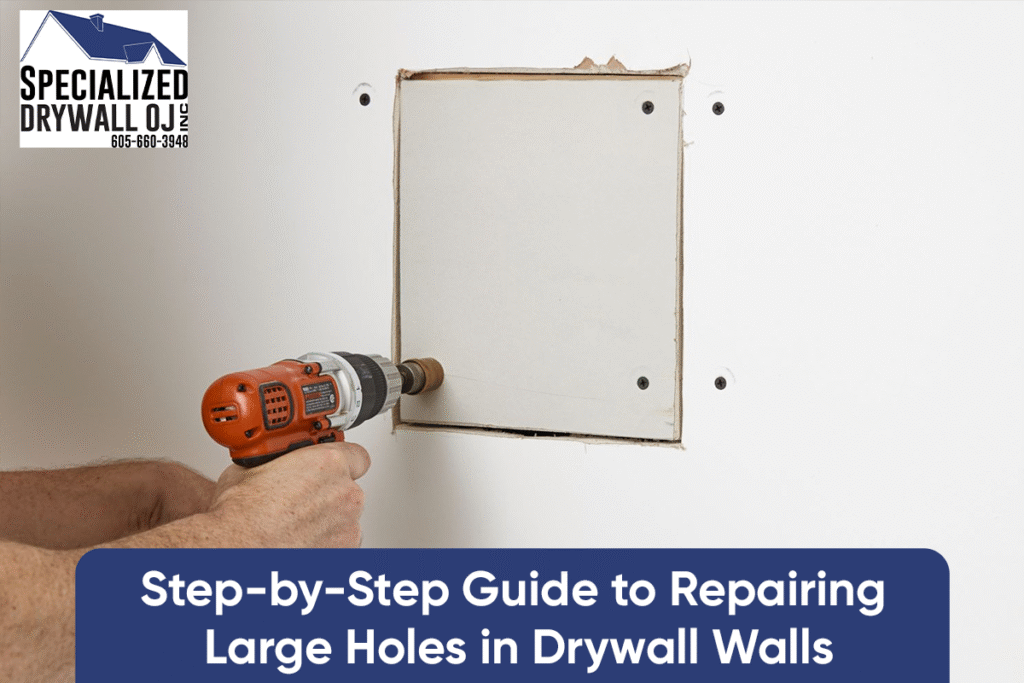
Step 3: Cut and Attach the Drywall Patch
Measure the hole carefully and cut a replacement drywall piece of the same size. Test-fit it into the hole until it sits flush with the wall. Once it fits perfectly, screw it into the wooden backing.
This step might take a little patience, but getting a snug fit makes all the difference. A sloppy patch is harder to blend later, so take your time to line up edges properly.
Step 4: Tape and Mud the Seams
Now comes the magic part of drywall patching. Apply drywall tape along the seams where the new patch meets the existing wall. Mesh tape is easier for beginners, while paper tape offers a smoother finish when done right.
Next, spread a thin layer of joint compound (mud) over the tape using a drywall knife. Feather out the edges to blend with the wall surface. Don’t worry if it looks a little uneven at first—you’ll sand it smooth later.
Step 5: Sand, Repeat, and Smooth
Once the first coat of joint compound dries, sand it lightly with a sanding block or sponge. Apply a second coat, feathering it out further beyond the first layer. Sand again after it dries. Most large wall hole repairs require three coats for a flawless look.
Be patient here—rushing through sanding leaves visible bumps that will show under paint. The goal is to make the patch disappear completely.
Step 6: Prime and Paint the Wall
After your final sanding, the wall should look seamless. Wipe away dust and apply a coat of primer over the repaired area. Primer ensures the paint sticks evenly and prevents flashing (a shiny spot where the patch shows through).
Finally, paint the wall to match the existing color. If possible, use leftover paint from the original job. Otherwise, bring a paint chip to the store for a color match.
DIY vs. Professional Drywall Repair Service
Sure, fixing drywall holes yourself saves money, but it can also be time-consuming—especially for larger repairs. If you’re not confident in your skills or the hole is too big, consider hiring a drywall repair service. Professionals bring years of experience, the right tools, and a guarantee of a flawless finish.
If you’re located in California, Specialized Drywall offers expert sheetrock services to restore walls quickly and effectively. You can also check their blog on why sheetrock plaster finish is a smart choice.
Final Thoughts: Don’t Fear the Wall Hole
Wall holes happen—it’s just part of life. But instead of panicking, grab your tools and tackle the project with confidence. Once you know how to repair drywall holes, you’ll never look at damage the same way again.
A clean, polished repair not only improves your home’s appearance but also saves you money on hiring pros for smaller jobs. Still, when in doubt, don’t hesitate to reach out for expert drywall patch repair to guarantee a flawless finish.
FAQs About Drywall Hole Repair
1. Can I repair a large drywall hole without replacing drywall?
Not really. Small holes can be patched with mesh, but large holes require a new drywall piece for stability.
2. What’s the easiest way to fix a drywall hole?
For small drywall hole repair, a drywall repair kit is quick and easy. For larger holes, you’ll need a patch and joint compound.
3. How long does it take to repair large drywall holes?
Depending on drying times between coats, most repairs take 1–2 days.
4. Do I need to hire a drywall repair service?
Not always. If you’re handy with tools, DIY works. But for bigger or multiple holes, hiring a pro saves time and stress.
5. How do I make my repair invisible?
Use thin, feathered layers of joint compound, sand carefully, and always prime before painting.