Drywall installation is one of the most important phases of any renovation or new construction project. Whether you’re remodeling a single room or building an entire home, proper preparation ensures the installation process goes smoothly, safely, and efficiently. Many homeowners underestimate the impact of preparation on the final result. Without proper planning, drywall installation can result in unnecessary dust, delays, flooring damage, and costly corrections.
Understanding how to prepare your home for drywall installation helps you protect your investment while making the contractor’s job easier. When preparation is done correctly, the installation process becomes faster, cleaner, and more precise. This guide walks you through everything you need to do before drywall installation to avoid common mistakes and achieve professional results.
Understanding the Drywall Installation Process
Before diving into preparation steps, it’s helpful to understand what drywall installation involves. The process typically includes hanging drywall panels, securing them to framing studs, taping seams, applying joint compound (mud), sanding, and finishing the surface for paint or texture.
Each of these steps generates dust, requires clear access to walls and ceilings, and demands properly aligned framing and utilities. If the space isn’t prepared properly, installers may face obstacles that slow progress or compromise quality. Preparation ensures the drywall fits correctly, seams are clean, and the final surface looks flawless.
Step 1: Clear the Work Area Completely
The first and most important step is clearing the workspace. Drywall sheets are large, heavy, and difficult to maneuver around furniture. Leaving items in the room increases the risk of damage and slows down installation.
Remove:
- Furniture (sofas, beds, tables, desks)
- Wall décor, mirrors, and artwork
- Curtains and blinds
- Rugs and removable floor coverings
- Electronics and fragile items
If certain large items cannot be removed, move them to the center of the room and cover them securely with thick plastic sheeting. The goal is to give installers full access to walls and ceilings without obstruction.
Step 2: Protect Floors and Surfaces
Drywall installation creates debris, dust, and occasionally dropped materials. Protecting floors and nearby surfaces prevents costly damage.
Use:
- Heavy-duty drop cloths
- Rosin paper for hardwood floors
- Plastic sheeting for carpeted areas
- Painter’s tape to secure coverings
Proper floor protection not only prevents scratches and dents but also makes cleanup much easier after installation is complete.
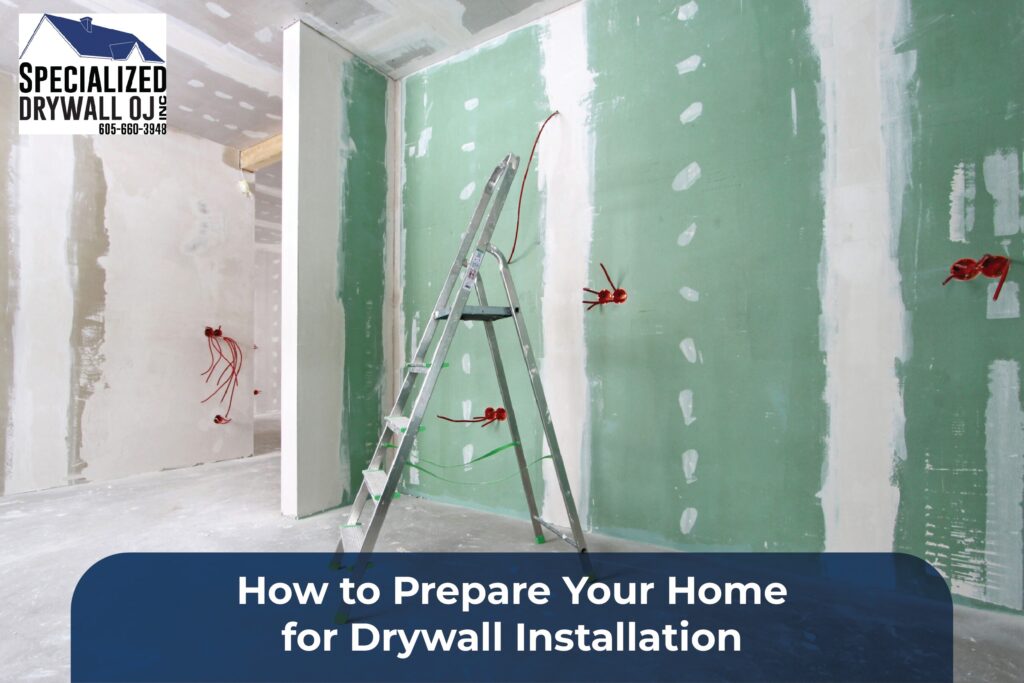
Step 3: Inspect Framing and Structural Components
Before drywall panels are installed, the underlying structure must be inspected. Drywall attaches directly to framing studs so that any misalignment will show in the final finish.
Carefully check for:
- Warped or bowed studs
- Loose framing connections
- Uneven surfaces
- Signs of mold or moisture damage
Addressing these issues in advance ensures smooth drywall installation and prevents visible imperfections later. If moisture is present, resolve it immediately. Installing drywall over damp areas can lead to mold growth and structural damage.
Step 4: Complete Electrical and Plumbing Rough-Ins
Drywall installation should never begin before electrical and plumbing systems are fully installed. Once drywall is in place, accessing these systems becomes difficult and expensive.
Make sure:
- Electrical wiring is secured and positioned properly
- Outlet and switch boxes are correctly aligned.
- Plumbing pipes are firmly installed.
- HVAC ductwork is complete
- Low-voltage wiring (internet, cable, security) is finalized.
Clearly mark the locations of all outlets, switches, and fixtures. This helps installers cut precise openings and prevents errors.
Step 5: Install Insulation and Vapor Barriers
If your project involves exterior walls, insulation must be installed before drywall goes up. Proper insulation improves energy efficiency and sound control.
Depending on your climate and building codes, you may also need vapor barriers to prevent moisture buildup. Ensuring these materials are properly installed before drywall installation prevents long-term issues such as condensation and mold.
This stage is critical in both residential drywall services and commercial projects. Skipping insulation preparation can reduce comfort and increase energy costs.
Step 6: Plan the Drywall Layout
Strategic planning improves both aesthetics and structural strength. Drywall sheets should be arranged to minimize seams and reduce waste.
Installers typically:
- Measure wall height and width.
- Plan horizontal or vertical sheet placement.
- Stagger seams for stability.
- Mark the study locations clearly.
Good layout planning reduces cracking and creates a cleaner final appearance. It also speeds up installation time.
Step 7: Control Dust and Ventilation
Drywall sanding generates fine dust that can travel throughout your home. Controlling dust is essential for maintaining indoor air quality and preventing contamination of other rooms.
Effective dust control includes:
- Sealing doorways with plastic barriers
- Covering air vents temporarily
- Using fans for proper ventilation
- Closing off adjacent rooms
- Installing temporary dust containment walls if needed
Dust management protects both your home and your health during the project.
Step 8: Prepare Tools and Materials (For DIY Projects)
If you’re handling drywall installation yourself, preparation includes gathering proper tools and materials.
You will need:
- Drywall sheets
- Drywall screws or nails
- Drill or screw gun
- Joint compound
- Drywall tape
- Utility knife
- T-square
- Sanding tools
- Safety goggles and a mask
Having everything ready before starting prevents interruptions and ensures efficient workflow.
Step 9: Communicate Clearly with Your Contractor
If you’re hiring professionals, communication is key. Before installation day, review expectations with your contractor.
Discuss:
- Project timeline
- Access to the property
- Work hours
- Texture preferences
- Cleanup responsibilities
- Special design features
Clear communication prevents misunderstandings and ensures the final result matches your expectations.
Step 10: Final Pre-Installation Checklist
Before drywall arrives, confirm:
- Rooms are fully cleared
- Floors are protected
- Framing is inspected
- Electrical and plumbing are complete.
- Insulation is installed
- Dust control measures are ready.
- The contractor has full access.
Completing this checklist ensures a smooth start to your drywall installation project.
Common Mistakes to Avoid
Even small oversights can create major setbacks. Avoid these common preparation mistakes:
- Starting drywall before electrical rough-ins are complete
- Failing to protect floors
- Ignoring moisture problems
- Leaving furniture in the workspace
- Skipping framing inspections
- Poor dust control planning
Taking time to prepare correctly saves money, prevents delays, and guarantees better results.
Why Proper Preparation Matters
When homeowners properly prepare their space, drywall installation becomes faster and more efficient. Installers can work without obstacles, materials are protected, and the finished product looks professional.
Preparation reduces:
- Installation delays
- Repair costs
- Surface imperfections
- Health risks from dust
- Structural issues later on
In short, preparation directly impacts the quality and durability of your drywall system.
Conclusion
Learning how to prepare your home for drywall installation is essential for any successful renovation or construction project. By clearing the space, protecting surfaces, inspecting structural elements, completing rough-ins, and controlling dust, you create the ideal environment for professional results.
Whether you’re hiring experts or tackling the job yourself, proper preparation ensures smoother installation, cleaner finishes, and long-lasting durability. Taking the time to plan now prevents costly mistakes later and guarantees your drywall project is completed efficiently and professionally.
FAQs
Ans: Drywall installation typically takes 1–3 days for standard rooms, depending on project size and complexity. Finishing and drying times may extend the overall timeline.
Ans: You can stay home, but expect noise and dust. Proper dust containment helps minimize disruption.
Ans: Permits are typically required only when drywall installation is part of a structural renovation or major remodeling. Check local regulations.
Ans: Drywall sanding produces fine dust, but proper preparation and containment significantly reduce the mess.
Ans: In some cases, yes. However, it’s best to inspect the existing surface to ensure it is structurally sound and free of moisture issues.