Sheetrock, also known as drywall or gypsum board, is a common material used in the construction of interior walls and ceilings. Proper handling and installation of sheetrock are crucial for achieving a smooth, durable finish that enhances the aesthetic and functional quality of a home. In this blog post, Specialized Drywall OJ INC helps provide a comprehensive guide on how to handle sheetrock in a newly constructed home, covering everything from preparation to finishing touches.
Understanding Sheetrock Basics
Sheetrock is composed of a gypsum core sandwiched between two sheets of paper. It is available in various sizes and thicknesses, with the most common sizes being 4×8 feet and 4×12 feet. Thicknesses typically range from 1/4 inch to 5/8 inch, with 1/2 inch being the most standard for residential construction. Knowing the appropriate type of sheetrock for different areas of your home is essential. For instance, 5/8 inch sheetrock is often used for ceilings due to its increased rigidity and fire-resistant properties.
Sheetrock, also known as gypsum board or drywall, is a versatile building material used for interior walls and ceilings. It consists of gypsum plaster sandwiched between layers of paper, offering durability and fire resistance. Sheetrock installation involves cutting, fitting, and securing panels to create smooth, seamless surfaces ready for finishing with paint or texture. Understanding Sheetrock basics includes knowing common sizes, thicknesses, and techniques for installation and repair. For professional Sheetrock services, experts ensure precise installation, seamless joints, and proper finishing, enhancing the aesthetic and structural integrity of any space.
Preparing for Sheetrock Installation
Preparation is a critical step in the sheetrock installation process. Begin by ensuring that the framing of the walls and ceilings is plumb, level, and square. Any irregularities in the framing can lead to issues during and after sheetrock installation. Check for any protruding nails or screws in the framing and remove them. Additionally, mark the location of all studs, electrical outlets, and other fixtures on the floor or ceiling to make it easier to locate them once the sheetrock is in place.
Preparing for Sheetrock installation involves several key steps to ensure a smooth process. Begin by clearing the room of furniture and covering floors with protective materials. Check electrical and plumbing systems for any adjustments needed before installation. Measure and cut Sheetrock sheets to fit, ensuring seams align for a seamless finish. Lastly, prepare the walls by ensuring they are clean, dry, and free of debris. Proper preparation ensures a successful Sheetrock installation.
Cutting Sheetrock to Size
Accurate cutting of sheetrock is essential for a professional-looking finish. Measure the area where the sheetrock will be installed and mark the dimensions on the sheetrock using a pencil and a straight edge. Use a utility knife to score along the pencil line, then snap the sheetrock along the scored line. For cutting out holes for electrical outlets, switches, or other fixtures, use a keyhole saw or a rotary tool. Take your time with this step to ensure precise cuts that fit snugly around openings.
Installing Sheetrock on Walls
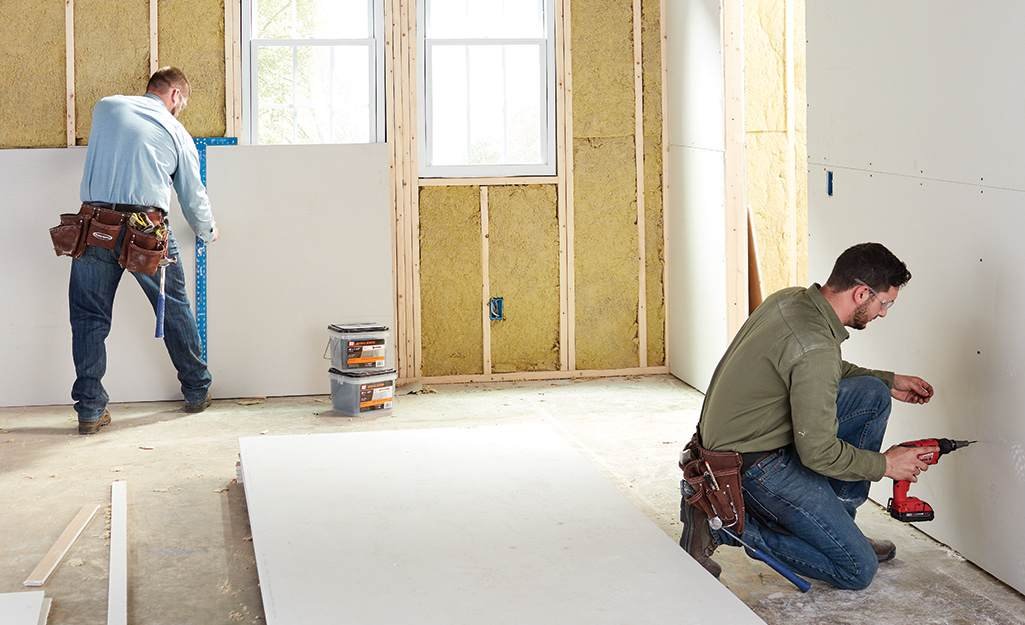
When installing sheetrock on walls, begin by securing the top edge of the sheetrock to the framing. Use drywall screws, spaced approximately 16 inches apart, to attach the sheetrock to the studs. Be sure to countersink the screws slightly below the surface of the sheetrock without breaking the paper face. This will make it easier to cover the screw heads with joint compound later. Continue attaching the sheetrock, working your way down the wall and ensuring that each piece is securely fastened and properly aligned.
Installing Sheetrock on walls involves measuring, cutting, and securing panels with screws or nails. Start from one corner and work across, ensuring seams are staggered for strength. Use joint tape and compound to cover joints and screws, sanding between layers for a smooth finish. Consider soundproofing or fire-resistant options as needed. Proper installation ensures structural stability and aesthetic appeal in new home construction. By following best practices, such as proper framing and moisture control, you ensure long-term durability and satisfaction with your Sheetrock walls.
Installing Sheetrock on Ceilings
Installing sheetrock on ceilings can be more challenging due to the need to work overhead. It is often helpful to use a drywall lift or have an assistant to help hold the sheetrock in place while you secure it to the ceiling joists. Start by attaching the sheetrock to the joists along the perimeter of the ceiling, then fill in the center. As with walls, ensure that the screws are countersunk and that the sheetrock is properly aligned and securely fastened.
Taping and Mudding Sheetrock
Once the sheetrock is installed, the next step is to tape and mud the seams and screw heads. Begin by applying a layer of joint compound to the seams using a taping knife. Place drywall tape over the joint compound and smooth it out with the taping knife, ensuring there are no bubbles or wrinkles. Apply additional layers of joint compound over the tape, feathering the edges to blend with the surrounding sheetrock. Allow each layer to dry completely before applying the next. This process may take several days, as each layer needs adequate drying time.
Sanding and Finishing Sheetrock
After the joint compound has dried, sand the surface to create a smooth, even finish. Use fine-grit sandpaper and a sanding block, working in circular motions to avoid creating scratches or gouges. Be sure to wear a dust mask and use proper ventilation, as sanding can create a significant amount of dust. Once sanding is complete, inspect the surface for any imperfections and apply additional joint compound if necessary. Sand again once the additional compound is dry.
Priming and Painting Sheetrock
With the sheetrock sanded and smooth, it is time to prime and paint. Priming is an essential step that prepares the surface for paint and helps to seal the sheetrock, preventing the paint from being absorbed unevenly. Apply a high-quality primer using a roller and brush, ensuring full coverage. Once the primer is dry, apply the paint in the color of your choice. Use a roller for large areas and a brush for edges and corners. Apply at least two coats of paint for a durable, attractive finish.
Dealing with Common Issues
During the sheetrock installation process, you may encounter common issues such as cracks, nail pops, or uneven seams. Address cracks by applying joint compound and tape, followed by sanding and repainting. Nail pops, which occur when the drywall screws or nails push out from the surface, can be fixed by removing the offending screw or nail, re-securing the sheetrock, and applying joint compound. Uneven seams can be smoothed out with additional joint compound and sanding.
Maintaining Sheetrock
Proper maintenance of sheetrock ensures its longevity and appearance. Regularly inspect walls and ceilings for any signs of damage, such as cracks or water stains. Address any issues promptly to prevent further damage. Avoid hanging heavy objects on sheetrock without proper support, as this can cause the material to crack or break. Clean painted sheetrock surfaces with a mild detergent and water, avoiding harsh chemicals that can damage the paint.
Maintaining Sheetrock involves regular inspection for cracks, holes, and water damage. Promptly repair any issues to prevent further deterioration and maintain structural integrity. Use appropriate tools and materials for patching and finishing to achieve a smooth surface. Regularly clean and dust Sheetrock to keep it looking fresh. Properly painted or treated Sheetrock enhances durability and aesthetics, crucial for a productive home office environment. By ensuring your Sheetrock is well-maintained, you create a conducive space that promotes focus and productivity.
FAQs
When Sheetrocking a room do you do the ceiling or walls first?
This makes it much easier to manage and attach the panels since you will not have to fumble around with the screws, measuring tape, and so on. Screws for drywall lids should be placed no closer than 16” from the wall. This allows the drywall to have a bit of flexibility to prevent ceiling cracks.
How is sheetrock installed?
- Prepare the Drywall Sheets for the Ceiling.
- Install Drywall on the Ceiling.
- Measure and Cut Drywall for the Wall.
- Install Drywall on the Wall.
- Cut Openings for Doors, Windows and Outlet Boxes.
- Secure the Drywall Against the Outside and Inside Corners.
- Add the Finishing Coats of Drywall Compound.
What’s the difference between sheetrock and drywall?
Sheetrock is easily explained. Sheetrock is actually one brand of drywall, and it’s made by the U.S. Gypsum Company (USG). It was created in the early 1900s, so it’s become synonymous with the word drywall. Drywall is also called wallboard, gypsum board or plasterboard.
Should sheetrock touch the floor?
It might sound counter intuitive at first to leave space between your floor and your wall, but you should always leave a ½ inch to ⅝ inch gap between drywall and the floor. There are several reasons for this: Drywall absorbs moisture
What is sheetrock used for in construction?
What is Sheetrock? Sheetrock is a brand of drywall, though because of its popularity, the term has come to be used interchangeably with drywall. Sheetrock is also used as a replacement for lath and plaster in the construction of interior ceilings and walls, though some Sheetrock is weatherproofed for exterior ceilings.
Conclusion
Handling sheetrock in a newly constructed home requires careful planning, precision, and attention to detail. By following the steps outlined in this article, you can achieve a professional-quality finish that enhances the beauty and functionality of your home. Proper preparation, accurate cutting, secure installation, and thorough finishing are all crucial components of successful sheetrock handling. With patience and practice, you can master the art of sheetrock installation and enjoy the satisfaction of a job well done.