Moisture-resistant drywall, often called green board, is a vital material for bathrooms due to its ability to withstand damp conditions. Proper installation is crucial to ensure its durability and protect your bathroom from mold, mildew, and water damage. Whether you’re renovating an old bathroom or building a new one, this guide provides detailed steps for selecting, preparing, and installing moisture-resistant drywall. By following these tips, you can achieve a polished, long-lasting result. Let’s Join Specialized Drywall OJ INC to explore how to install moisture-resistant drywall and maintain a safe and beautiful bathroom environment.
Why Choose Moisture-Resistant Drywall for Bathrooms?
Moisture-resistant drywall is designed to combat the high humidity levels common in bathrooms. Its composition includes a water-resistant core and a specially treated surface to repel moisture. Unlike regular drywall, it significantly reduces the risk of mold growth and structural damage. This type of drywall is perfect for areas like shower walls and ceilings, where water exposure is frequent. Additionally, moisture-resistant drywall offers durability and an extended lifespan, making it a cost-effective choice. Installing it enhances both the functionality and appearance of your bathroom, ensuring it remains in excellent condition for years to come.
Tools and Materials Required for Installation
To install moisture-resistant drywall, you’ll need specific tools and materials:
- Moisture-Resistant Drywall Sheets – Choose the correct thickness.
- Drywall Screws – For secure attachment.
- Screw Gun – Speeds up installation.
- Utility Knife – For cutting drywall.
- Measuring Tape and Pencil – Ensures precise cuts.
- Drywall Joint Tape – For seamless edges.
- Joint Compound – Smoothens joints and screws.
- T-Square – For accurate measurements.
- Safety Gear – Gloves, goggles, and a dust mask.
- Moisture Barrier (if needed) – Provides extra protection against water.
Having all materials ready will streamline the process and ensure professional results.
Step 1: Prepare the Bathroom Walls and Ceiling
Preparation is crucial before installing moisture-resistant drywall. Begin by removing old drywall, nails, or screws. Inspect the underlying structure for any signs of water damage or mold, and repair as needed. Ensure the studs are clean, dry, and properly spaced, typically 16 or 24 inches apart. Applying a moisture barrier, such as polyethylene sheets or a liquid membrane, over the studs is highly recommended for added protection. Use measuring tape and a pencil to mark the dimensions of the walls and ceilings. Proper preparation ensures the drywall fits seamlessly and remains stable, creating a durable base for installation.
Step 2: Cut the Drywall to Fit
Cutting moisture-resistant drywall accurately is essential for a perfect fit. Use a measuring tape to determine the required dimensions and mark them clearly on the drywall sheet. With a utility knife, score the paper side along the marked line, then snap the sheet along the score for a clean break. Smooth the edges with sandpaper or a rasp to prevent uneven joints. When cutting for outlets, fixtures, or vents, use a drywall saw for precision. Always double-check your measurements before cutting to minimize waste and ensure each piece fits seamlessly within the designated area.
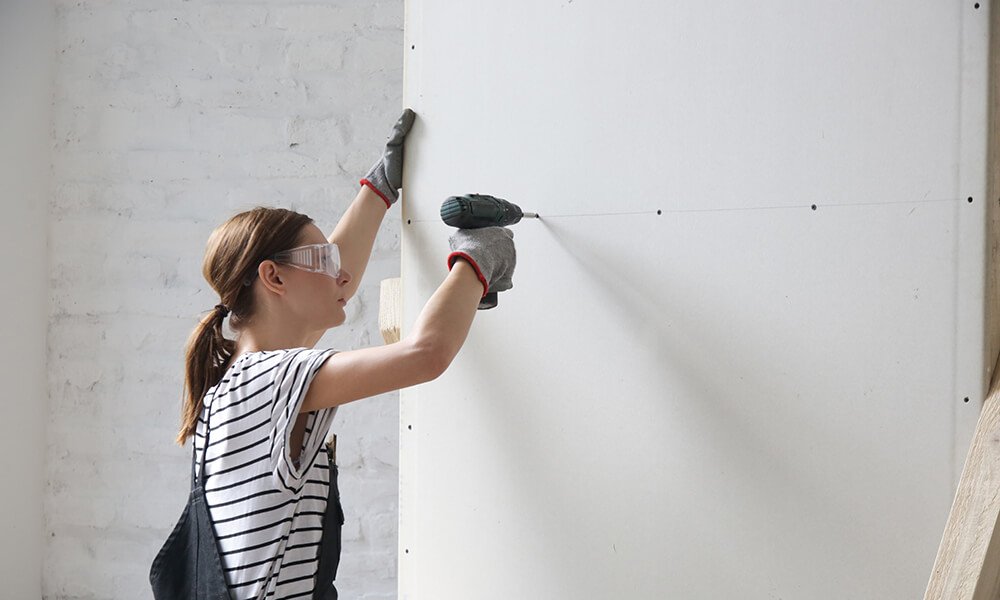
Step 3: Secure the Drywall to the Studs
Attach the drywall sheets to the wall studs using drywall screws. Position the sheets horizontally or vertically, depending on the room’s layout, and align the edges with the studs. Drive the screws every 8-12 inches along the studs, ensuring they are slightly recessed without breaking the drywall surface. Use a screw gun to maintain speed and consistency. Leave a small gap (about 1/8 inch) between the drywall and the floor to prevent moisture absorption. Secure all sheets firmly, checking for any loose spots. Proper fastening ensures the drywall remains stable and resistant to movement over time.
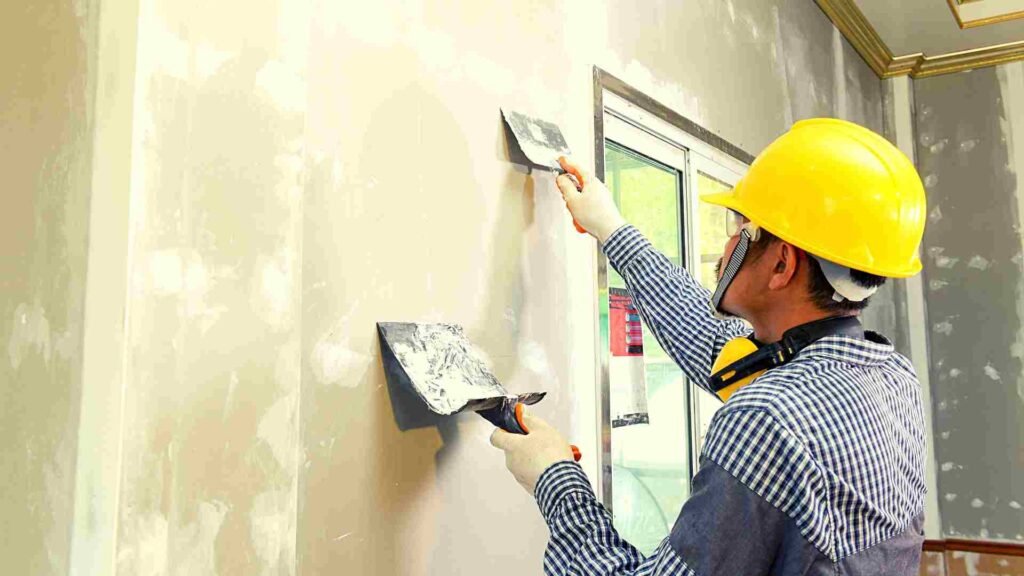
Step 4: Tape and Apply Joint Compound
After securing the drywall, focus on finishing the seams. Apply drywall tape over all joints, pressing it firmly to prevent bubbling. Spread a thin layer of joint compound over the tape using a drywall knife, smoothing it evenly. Cover screw heads with a small amount of compound as well. Allow the first layer to dry completely, then sand it lightly to remove imperfections. Apply a second and third layer, feathering the edges for a smooth transition. Once the compound is dry and sanded, the seams should be invisible, creating a flawless surface ready for priming and painting.
Step 5: Prime and Paint the Drywall
Priming moisture-resistant drywall is essential before painting. Choose a high-quality primer specifically designed for bathrooms, as it provides an additional moisture barrier. Apply the primer evenly with a roller, covering all surfaces, and let it dry completely. Follow with a paint designed for high-humidity areas, such as satin or semi-gloss finishes. These paints resist moisture and are easy to clean, ensuring a polished and durable appearance. Proper priming and painting not only enhance the drywall’s aesthetic appeal but also extend its lifespan, protecting it from water damage and mold growth.
Step 6: Seal Gaps and Edges Properly
Sealing gaps and edges ensures your moisture-resistant drywall is fully protected against water intrusion. Use waterproof caulk to seal gaps between the drywall and fixtures such as bathtubs, sinks, and toilets. Pay close attention to corners, as these areas are prone to moisture buildup. Apply the caulk evenly and smooth it out with a caulking tool or your finger for a neat finish. For additional protection, consider using a silicone-based sealant, which offers excellent water resistance. Properly sealed gaps and edges not only enhance the durability of the drywall but also prevent the development of mold and mildew in hard-to-reach areas.
Choosing the Right Type of Moisture-Resistant Drywall
Not all moisture-resistant drywall is created equal. While green board is the most commonly used option, other varieties like purple board and cement board offer additional features. Purple board provides superior mold resistance and is suitable for extremely damp environments. Cement board is an excellent choice for areas with direct water contact, such as behind tiles in shower stalls. When selecting drywall, consider factors like humidity levels, budget, and the specific location of installation. Understanding the differences between these materials allows you to choose the best option for your bathroom, ensuring long-term protection and performance.
Common Mistakes to Avoid During Installation
Avoiding common mistakes during installation can save you time and money. One frequent error is neglecting to install a moisture barrier before attaching drywall, which can lead to water damage. Cutting drywall inaccurately or failing to account for fixtures can result in wasted material. Over-tightening screws can crack the drywall surface, compromising its integrity. Skipping multiple layers of joint compound may leave visible seams, detracting from the finished appearance. Always follow manufacturer guidelines and take your time to ensure each step is completed correctly. Avoiding these mistakes helps you achieve a professional-looking result that lasts.
Benefits of Professional Installation
While DIY installation is possible, hiring professionals offers several advantages. Experienced installers have the tools and skills to complete the job efficiently and correctly. They can identify potential issues, such as structural problems or existing water damage, and address them before installing the drywall. Professionals also ensure proper sealing, taping, and finishing, resulting in a polished and durable outcome. Additionally, they can help you select the best type of moisture-resistant drywall for your bathroom’s specific needs. Investing in professional installation provides peace of mind and ensures your bathroom walls are built to withstand moisture for years to come.
Maintenance Tips for Moisture-Resistant Drywall
Regular maintenance helps your moisture-resistant drywall last longer. Wipe down walls periodically to remove moisture and prevent mold buildup. Use exhaust fans to reduce humidity levels after showers or baths. Inspect caulking around fixtures and edges for signs of wear and replace it if necessary. Avoid using abrasive cleaners that can damage the paint or drywall surface. If you notice any signs of water damage, address the issue promptly to prevent further problems. Proper care and maintenance will keep your bathroom walls looking fresh and functional for years to come.
Conclusion
Installing moisture-resistant drywall in bathrooms is a practical way to safeguard against water damage and mold. By following these steps—from preparation to finishing—you can achieve a professional-grade installation that enhances the durability and beauty of your bathroom. Regular maintenance further ensures that your drywall remains in excellent condition, providing a long-lasting solution for high-moisture areas. Take the time to install and care for your moisture-resistant drywall properly, and enjoy a safe, stylish, and functional bathroom space for years to come.